What is HeresJMS

Hermes is an open source JMS (Java Messaging System) client. Hemes introduces itself on its website as follows (see http://www.hermesjms.com/):
HermesJMS is an extensible console that helps you interact with JMS providers making it easy to browse or seach queues and topics, copy messages around and delete them. It fully integrates with JNDI letting you discover administered objects stored, create JMS sessions from the connection factories and use any destinations found. Many providers include a plugin that uses the native API to do non-JMS things like getting queue depths (and other statistics) or finding queue and topic names.
This document describes how to connect with HermsJMS to TIBCO. The first part focuses on using JNDI lookups. The second part uses native TIBCO calls.
The test setup
For this document I used TIBCO EMS 4.4 and HermesJMS v1.12 but I think the explanation is quiet generic and will work for other versions as well.
I have two TIBCO EMS servers running on tcp://localhost:8222 and tcp://localhost:9222 making together a fault tolerant pair. This can be changed to any two machines. We will use the TIBCO admin tool to create JNDI settings.
I have a queue called SampleQueues.MyQueue with following properties
tcp://localhost:8222> show queue SampleQueues.MyQueue
 Queue:                 SampleQueues.MyQueue
 Type:                  static
 Properties:            *secure,*sender_name_enforced,*failsafe,*exclusive,
*prefetch=1,*maxRedelivery=100
 JNDI Names:            <none>
 Bridges:               <none>
 Receivers:             0
 Pending Msgs:          0
 Delivered Msgs:        0
 Pending Msgs Size:     0.0 Kb
tcp://localhost:8222> show queues
  Queue Name                             SNFGXIBCT  Pre  Rcvrs     Msgs    Size
  >                                      +--------    5*     0        0     0.0 Kb
  $sys.admin                             +--------    5*     0        0     0.0 Kb
  $sys.lookup                            *--------    5*     0        0     0.0 Kb
  $sys.undelivered                       +--------    5*     0        0     0.0 Kb
* $TMP$.EMS-SERVER-TEST.EE8499833C412.1  ---------    5      1        0     0.0 Kb
  SampleQueues.*                         +++-+----    1      0        0     0.0 Kb
  SampleQueues.MyQueue                   ***-*----    1*     0        0     0.0 Kb
I have a user MyUser configured that has full access rights on the queue
tcp://localhost:8222> showacl queue SampleQueues.MyQueue
Principal         Permissions for queue 'SampleQueues.MyQueue'
 User=MyUser      receive,send,browse
JNDI access to TIBCO
In order to access the queue through JNDI we need two things:
- a JNDI accessible connection factory to TIBCO
- a JNDI name for a TIBCO queue.
It is important to know that TIBCO is a JMS server that has a JNDI server on board as well. So you don’t need a separate JNDI server.
First we’ll create the JNDI name for the Connection Factory:
Just enter the command below to create a factory called MyFactory that connect with the TIBCO cluster.
tcp://localhost:8222> create factory MyFactory generic
url=tcp://localhost:8222,tcp://localhost:9222
ConnectionFactory 'MyFactory' has been created
tcp://localhost:8222> show jndinames
JNDI Name       Type   Object Info
MyFactory       CF     tcp://localhost:8222,tcp://localhost:9222
Next we create the JNDI name for the queue:
Just enter the command below to create a queue called MySampleQueue.
tcp://localhost:8222> create jndiname MySampleQueue
queue SampleQueues.MyQueue
JNDI name 'MySampleQueue' has been created
tcp://localhost:8222> show jndiname
JNDI Name       Type   Object Info
MyFactory       CF     tcp://localhost:8222,tcp://localhost:9222
MySampleQueue   Queue  SampleQueues.MyQueue
Now we are going to configure Hermes:
In HermesJMS go to ‘options’ and select ‘configuration’
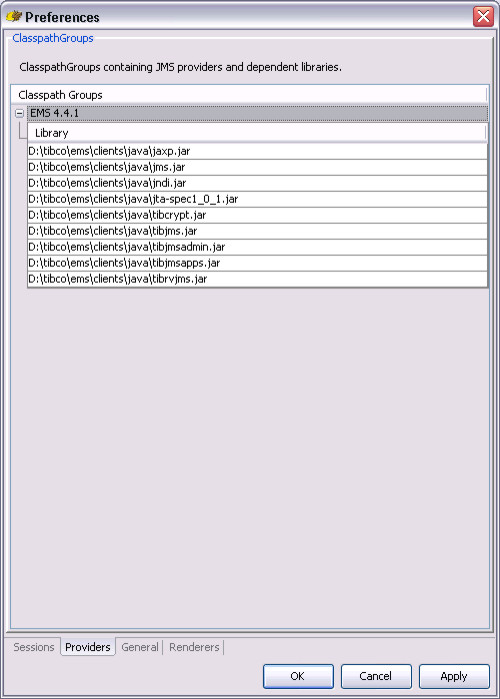
First we configure the TIBCO JMS libraries. Select the Providers tab. We need to create a classpath group. You do this by a right click and selecting “Add Group’ Give it a name EMS 4.4.1.
Now we need to add the libraries. Right click on libraries add select ‘Add JAR(s)’ then browse to the installation folder of TIBCO. I installed TIBCO under ‘c:\tibco’ If you have chosen to install the JAVA clients during the installation, you’ll find them under ‘c:\tibco\ems\clients\java’ I selected all the jars I could find but probably the ‘tibjms.jar’ is sufficient. Your configuration should now look like this:
Go to the session tab in the configuration window.
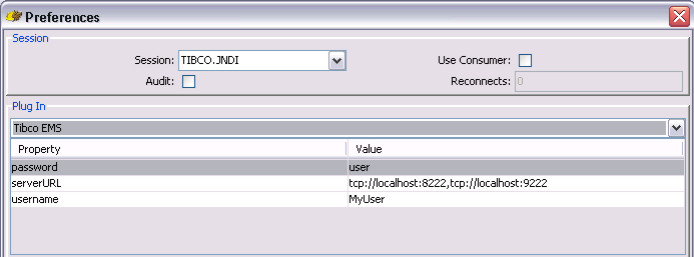
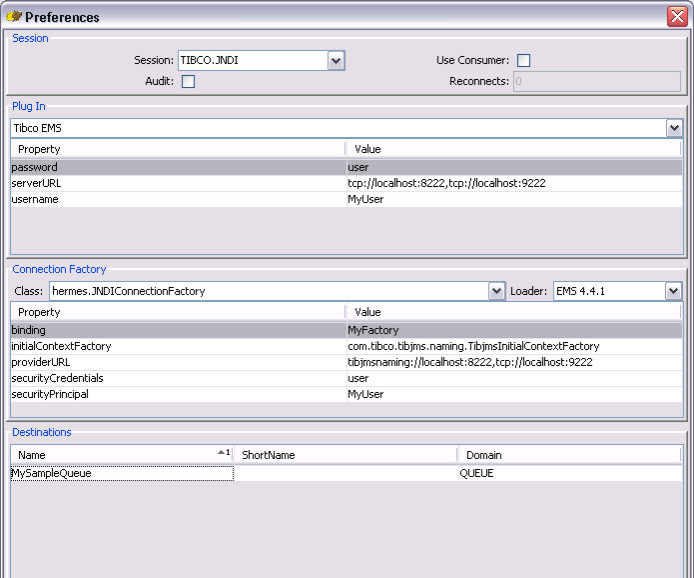
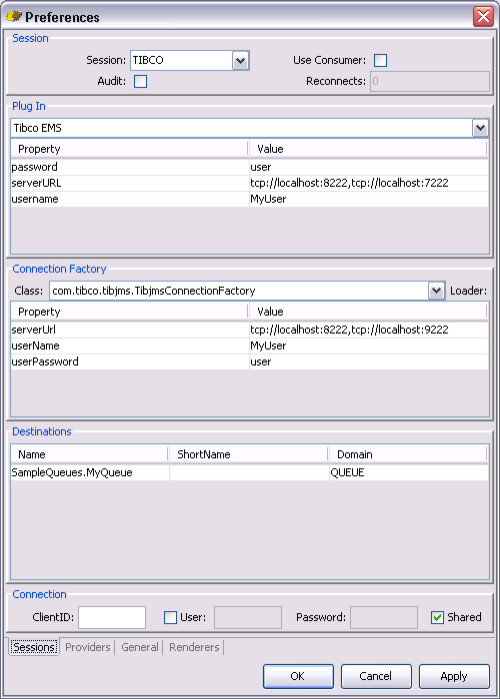
Create a new session and give it a name TIBCO.JNDI. In the Plug In dropdown select ‘Tibco EMS’ and create following properties for the Plug In section as indicated below.
In the Connection Factory dropdown choose ‘Hermes.JNDIConnectionFactory’ and for loader select the earlier created EMS 4.4.1.
Set following values for the other properties of the Connection Factory section:
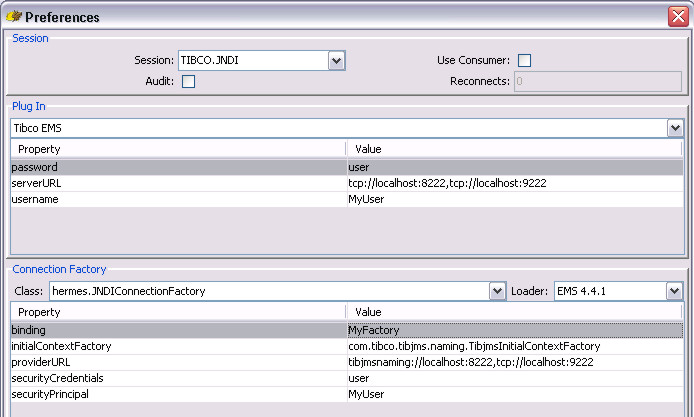
The binding is the JNDI name we have chosen for our generic connection factory i.e. MyFactory.
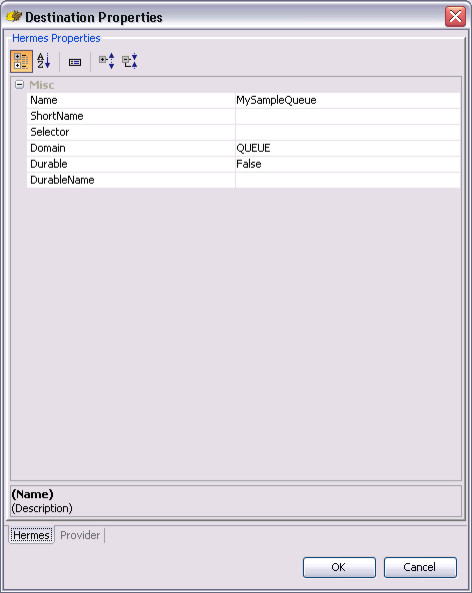
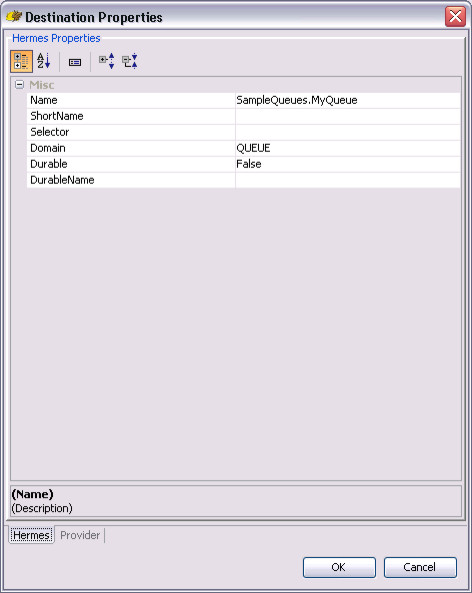
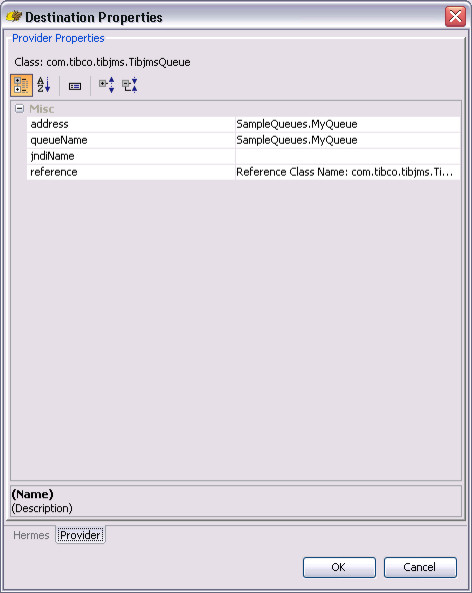
Now we a ready the add destionations. Add a new destination in the Destinations section by right clicking and selecting ‘Add’ We are now going to add the information of the queue known through JNDI as MySampleQueue: just modify the name and the rest will be filled automatically after you pressed ok. The screen should look like:
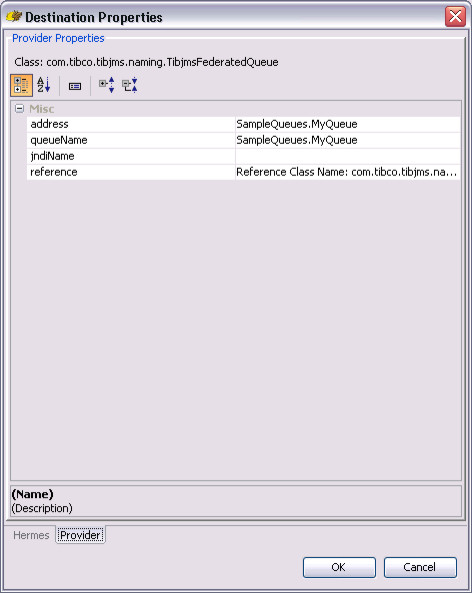
The setup with the filled Destination section:
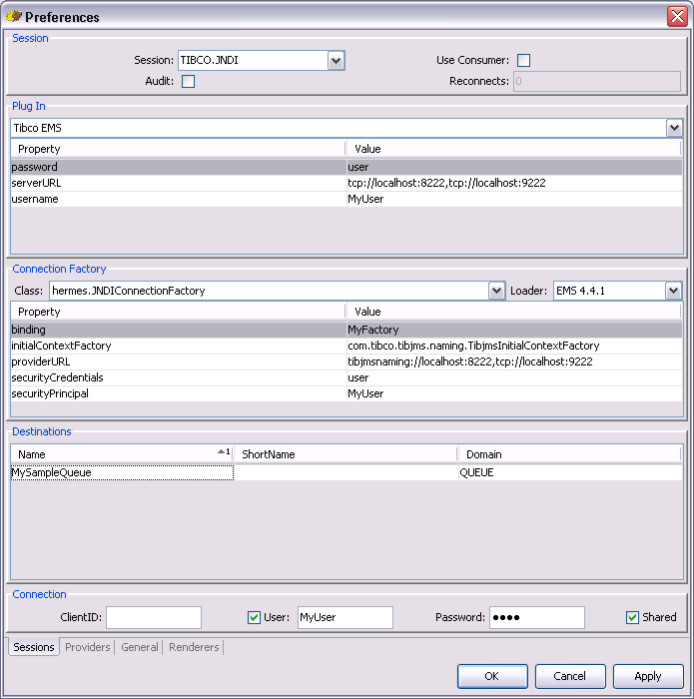
To complete the setup just add the user credentials to the Connection section and press apply and ok to leave the configuration screen. We just add the credentials of MyUser:
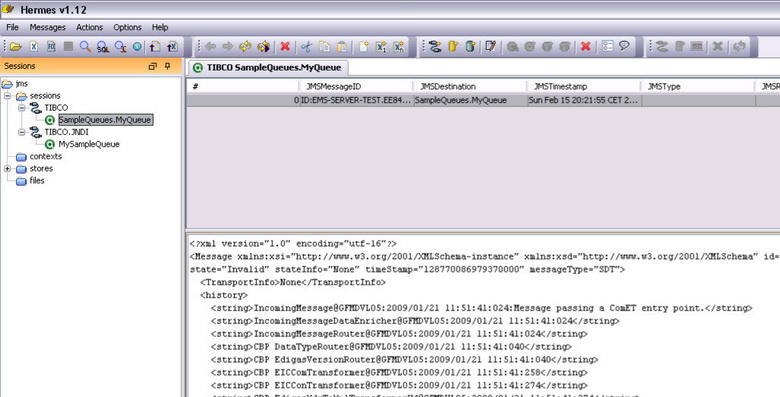
Going back to the main screen you see our new connection TIBCO.JNDI with the MySampleQueue destination.
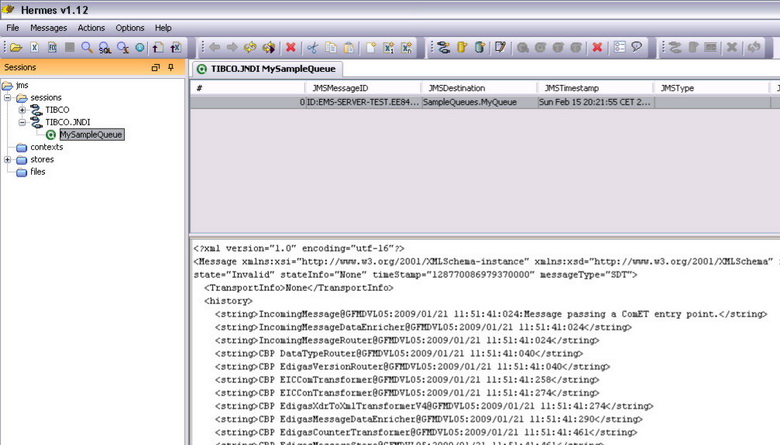
Important to know is that if the user does not have TIBCO admin rights, automatic discovery is not possible!
Direct access to TIBCO
In stead of using a generic JNDI client to access TIBCO we can also use TIBCO proprietary classes. I created a new session called TIBCO and the configuration is as follows:
It only differences in the Connection Factory section. The class does not indicate a generic HermesJMS JNDI client but uses a specific TIBCO JMS client. The destination is slightly different configured as well. To access queue we don’t need to use a JNDI name anymore. We case use the TIBCO queue name directly.
In the main screen we now have a TIBCO session and both created sessions can access TIBCO in the same easy way.